Electrical energy autonomy in this van is expected to be much more challenging in Winter than in other seasons. With little to no solar power available, the 12V battery pack(s) should ideally last a week before requiring a charge. As detailed in this previous post: Planning the Electrical & Energy System
Since heating will be needed 24/7, to avoid turning on the 110V inverter and incurring the associated ~50W power losses, it was crucial to install a 12V heating system.
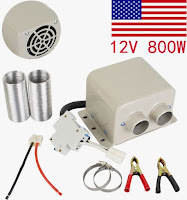
it was decided instead to go with a much more compact 800W fake-made-in-USA car heater that uses an itsy bitsy PTC heating element.
Update I knew that 800W was a totally fabricated bullmanure spec that Ebay
happily takes their $ cut off without batting a legal hoot. So, I was
expecting more like 600W, but never anticipated getting only... 300W !
That's at 13.2V 55°F (12°C) and decreases notably when getting closer to 68F (20C) or with low fan speed. Indeed, you're supposed to know that all these Amazon & Ebay vendors selling 200W to 800W 12V PTC heaters are actually advertising the PTC's startup power when their resistance is the lowest.
That, however, lasts only a mere second which is clearly not what you are buying these heaters for. Silly buyers, hoodwinked by complicit Big Tech laughing at the FTC and their whiny false advertising consumer protection laws...
Oh well, will have to use a portable 110V heater for now. And later either switch to a home made NiChrome based element, or triple the number of PTC elements.
Update2 Nope, electric heating doesn't cut it in sub 10°F (-12°C) temps, as experienced during the Ouray ice climbing test trip. Had to add a converted-to-gasoline diesel heater, as documented in this post series
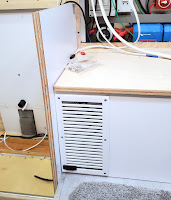
After folding some 1/16" aluminum sheet to create thermally decoupling baffles, the assembly was ready:
A wire mesh screen behind a 12x6" cast aluminum vent cover painted white completed the installation in the bench. The switch in the bottom left corner selects the fan speed: either slow and quiet via a step down regulator outputting 6.5V, or full blast at 12V.
A Honeywell RTH8560D thermostat controls the heater. It can run on 3 AA batteries or on an HVAC's 24V AC. Neither being desirable, the Vbatt line will simply be fed by an external 4.5V regulator. The wall mount connection plate was disposed of and cables were directly soldered to the pins on the board:
4.5V being the Vmax of 3 AA NIMH batteries in series, Vbatt is generated by a 12V to 5V regulator with a drop down 1N4004 diode in series. That results in a ~4 to 4.5V voltage, depending on the load. The diode was probably overkill as the thermostat likely supports up to 5V on Vbatt. But dunno for sure and didn't want to fry the thing.
Finally, the heater & fan are powered via a ridiculously oversized 250A 12V relay. The (R) thermostat signal usually connects to the HVAC 24V AC power line, and is theoretically only connected to the thermostat's relay outputs that control the HVAC devices. Since our own relay is 12V DC, that line was fed 12V DC instead. Worked like a charm 😎
 |
[TO BE UPDATED] fan speed switch / regulator missing
|
Consumption:
 |
insert pic
|
Hopefully, this heater will be powerful enough to keep us from freezing in -13°F (-25°C) weather ?
It won't take long to find out: going to the Ouray ice climbing festival in a week ! 🤞
____________________________________


Comments
Post a Comment