Unlike many van builds, this one will not have 2 roof fans to push / pull a large amount of air. For 2 main reasons:
- Surviving 1 week at -4°F / -20°C with a tight electrical budget requires a continuous & airtight insulation layer on the ceiling to minimize thermal losses due to the air stack effect (*)
- An AC system will be used in summer, removing the need to create a breeze to cool down the occupants
A
large fan in the ceiling is a massive heat + air loss path. An
insulating foam plug can be used to partly mitigate that, but it
prevents controlled air renewal and takes up storage space when not in
use. So, no fans in this van's ceiling.
However, maintaining
good air quality is crucial in a van. 2 humans living in such a small
space will quickly degrade air quality if measures are not taken to renew the air regularly. Like modern building codes now require in houses.
So, instead of ceiling mounted fans, air will be exhausted from low lying locations, via fans in key areas: toilet, shower, garage, AC box. That will minimize air leakage at the top of the air stack(*)
where the air and walls are warmest. It will also provide spot air
circulation where needed, like in the shower, or in the garage when wet
shoes / skis / bikes need drying.
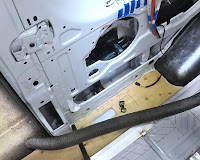
To preserve interior and floor space, the shower fan, and the toilet exhaust pipe are installed in the speaker cavity on the passenger side:
An
oblong hole was drilled with a hole saw, to make way for a 3x4" gutter
downspout section. The toilet exhaust pipe was similarly fed through:
After installing the downspout, an air tight box was built to host the fan:
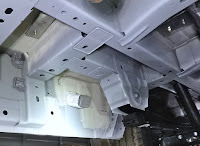
The exhausts exit through the skirt's walls under the chassis. An existing hole was enlarged with a nibbler to support a 45° elbow that connects with the downspout:
After treating the edges with an anti corrosion coating, voila the result:
After treating the edges with an anti corrosion coating, voila the result:
[update pic to show toilet pipe, mesh screens, secure mounts]
Each pipe's exhaust will be covered later with a screen mesh to prevent friendly visits or nesting from insects.
Finally, a temporary dam was set up around where the pipes go through the floor. Liquid caulk was then generously poured, sealing all the gaps around the pipes.
A
couple of coats of exterior rated polyurethane were applied to the
inside of the fan box. This will reduce humidity absorption by the wood,
as condensation is unavoidable
in this application. The fan, though, is just standard, not rated for
high humidity. So it may not last long. But the box / grill were
designed to make replacing it easy.
Now, that was a 'breeze' ! 😇
(*)
the air stack effect is simply warm air rising at the top of the air
column in a space. In winter, as the outside air is cold and denser, the
lighter hot air tends to escape upward and out. If both the top and
bottom layers of the space are leaky, this creates a continuously rising
air column, losing heat to the outside. In summer, when the air
conditioned inside space is cooler, the opposite happens: lighter air
from outside sips in from the top, and denser cool air exits at the
bottom.
Hence
my choice for an airtight and well insulated ceiling, as it is
virtually impossible to airtight the bottom half of a van due to the
weep holes in the wall cavities and the myriad of holes throughout the
dashboard / floor / doors.


Comments
Post a Comment